Understanding and Taking Blood Pressure

- Lab Goal: The goal of this lab is to accurately measure blood pressure, record results and verbalize ways that hypertension (high blood pressure) can damage the body.
- Lab Materials Required: Hypertension model, blood pressure cuff (sphygmomanometer), stethoscope, pencil, paper, and answer sheets.
- Objectives for the Experiment:
- Accurately measure and record blood pressure.
- Explain what is being measured by systolic and diastolic pressures.
- Correctly convert readings to fractions.
- Assess results to determine whether they are in normal range for healthy heart.
- Name diseases and injuries that can result from long-term high blood pressure
PRESENTATION AND PRACTICE
In this lab you will learn how to take blood pressure and report your findings as a fraction. You will also learn how to take several readings and record them on a graph so that you can compare your findings to what other people recorded.
When you come across a term that is difficult to say, go to one of the two pronunciation sites below.
- CLICK HERE to practice saying terms in English at http://www.howjsay.com/.
- CLICK HERE to practice saying terms in English at http://www.merckmanuals.com/home/pronunciations.
This fraction statement is read as "118 over 76 millimeters of mercury" Millimeters of mercury is a measure of blood pressure. It is stated in metric units instead of the U.S. Household units. It refers to the height to which the pressure in the blood vessels pushes a column of mercury. NOTE: In the math section of this station, you will practice measuring with the metric system. |
|

When you measure someone’s blood pressure, you will see two numbers shown on the gauge you use, as follows:
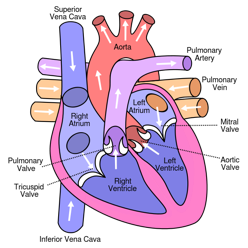
Systolic: The systolic reading is the pressure on the walls of the arteries as blood is pumped through the body. The top number of blood pressure, which is also the higher of the two numbers, is the measurement of the pressure in the arterieswhen the heart is working (contracting). When the heart contracts, it pushes the blood from the left ventricle of the heart.
Diastolic: The bottom number on the fraction, which is also the lower number of the two. This is a measurement of the pressure in the arteries when the heart muscle is resting between beats and refilling with blood.
 Check out this video! It explains how the heart pumps blood
https://www.youtube.com/watch?v=JA0Wb3gc4mE
The following video shows you the differences between systolic and diastolic blood pressure readings.
Blood Pressure Measurements
To prevent the chance of developing any of the diseases we discussed in the introduction, it is important to monitor your blood pressure and make sure that is stays inside the healthy range for an adult. The American Heart Association classifies blood pressure in one of six (6) categories:
Category |
Systolic in mmHg |
|
Diastolic in mmHg (bottom number) |
Low (Hypotension) |
Less than 90 |
or |
Less than 60 |
Normal |
90 – 119 |
and |
60 – 79 |
Pre-hypertension |
120 – 139 |
or |
80 – 89 |
Hypertension Stage 1 |
140 – 159 |
or |
90 – 99 |
Hypertension Stage 2 |
160 or more |
or |
100 or more |
Hypertensive Crisis (Emergency care needed) |
More than 180 |
or |
More than 110 |
Keep in mind that one high blood pressure reading does not necessarily mean someone has hypertension. Physicians usually advise their patients to check their blood pressure over a period of several weeks, to see if the hypertension is chronic.
Jot down how you would express the measurements above in fractions. For example, one expression of a normal blood pressure could be 90/65. Discuss your answers.
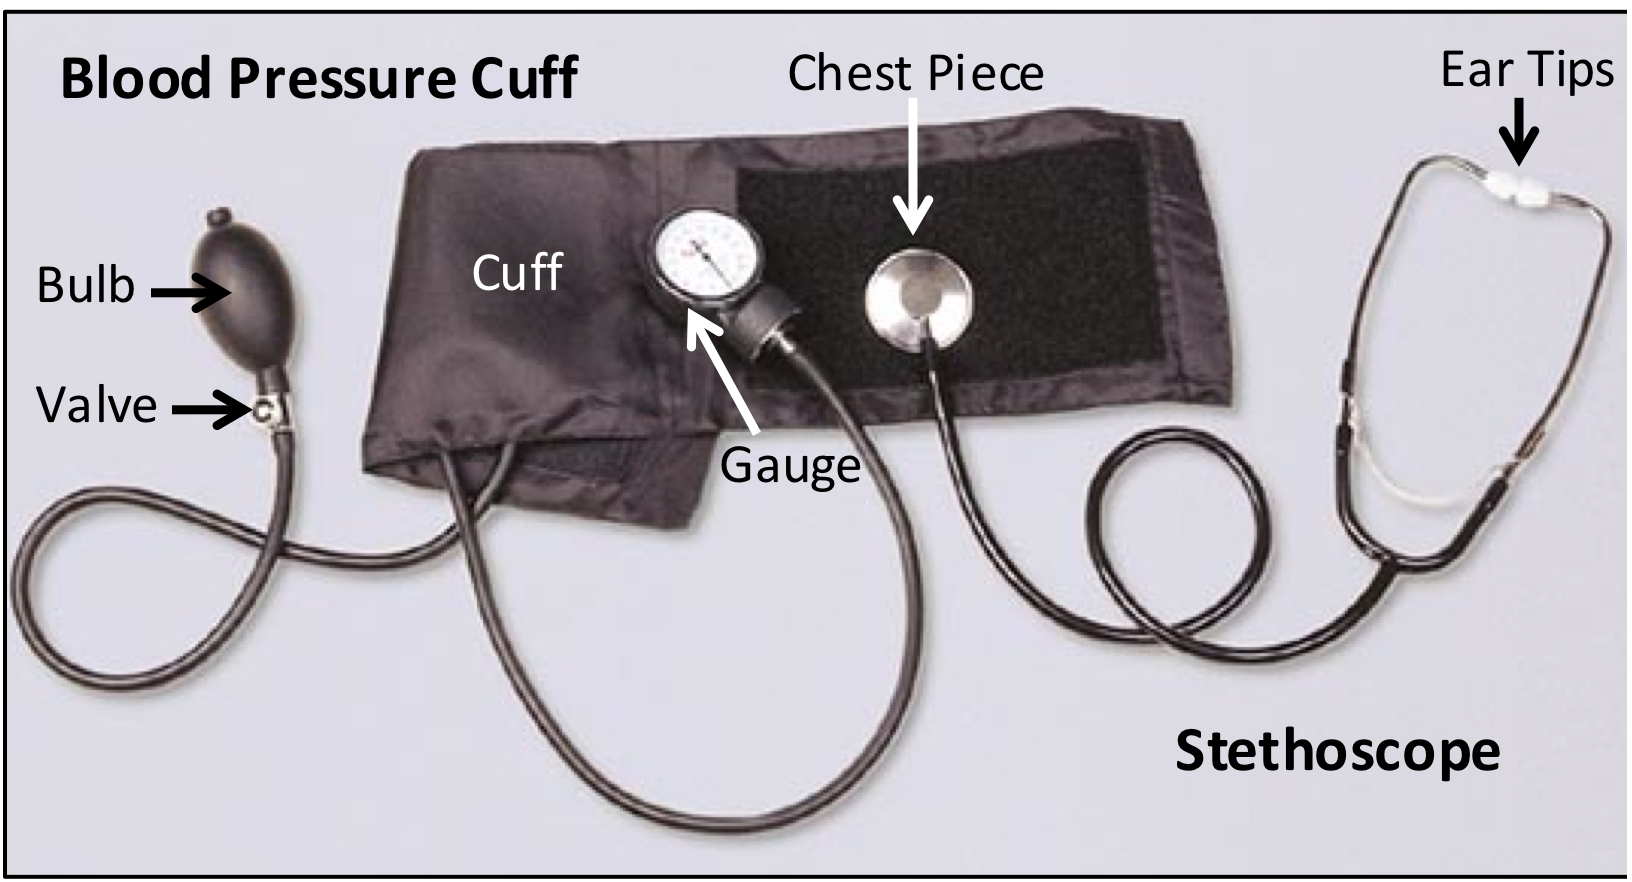
Equipment for Taking Blood Pressure
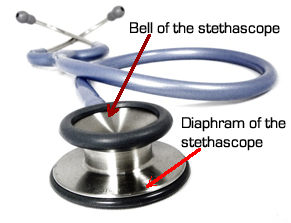
To take a manual blood pressure (without a machine), you need a stethoscope (STETH-o-scope) and a sphygmomanometer (SFIG-mom-man-AW-met-ur), which most people simply call a blood pressure cuff. The parts of a stethoscope and blood pressure cuff are shown below. (Go to the pronunciation sites linked above to hear terms pronounced.)
Steps for Taking Blood Pressure 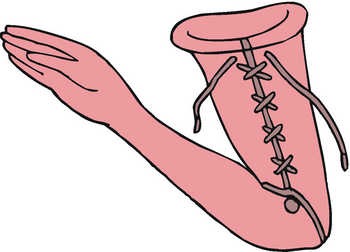
1. Let’s practice by taking your very first blood pressure on your coach. Wash your hands. Wipe the diaphragm and earpieces of the stethoscope with alcohol swabs.
2. Place the blood pressure cuff on the upper arm, approximately one inch above the bend in the elbow. |
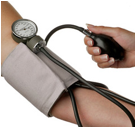 |
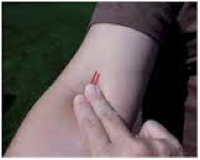
3. The artery marking on the cuff should point slightly to the inside of the arm. This is the brachial artery. |
|
4. Open the valve turning counter clockwise (left) on the bulb and make sure the blood pressure cuff is fully deflated and the cuff and stethoscope are in good working condition.
5. Place the stethoscope earpieces in your ears with them facing slightly forward. It is important that the earpieces fit in your ears snugly.
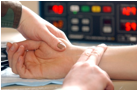
6. Find the radial (RAY-dee-uhl) pulse: slide two fingers down from the thumb and lightly palpate the pulse (feel with your fingers).
|
|
7. Close the valve on the bulb (turning clockwise, or to the right). Do not over-tighten.
8. Inflate the cuff while palpating the pulse.
9. Observe the number on the gauge when you no longer feel the pulse.
10. Inflate the cuff 30 more millimeters of mercury. For example, if you stop feeling the pulse at 120, inflate the cuff to 150.
|
12. Open the valve slightly with the thumb and index finger and deflate the cuff slowly.
13. Watch the gauge as you listen for the sound of the pulse. Remember the reading on the first beat you hear the pulse. This is the systolic pressure.
14. As the cuff deflates, continue listening for a change or muffled pulse sound. When the sound changes or disappears, you have the diastolic pressure. Remember that number.
15. Open the valve and deflate the cuff completely.
16. Wash your hands. Wipe the diaphragm and earpieces of the stethoscope with alcohol swabs.
17. Record the blood pressure like a fraction with the systolic pressure on top and the diastolic pressure on bottom. (example: 130/60)
Now Practice
Use these same steps to take the blood pressure of three (3) more people, and record the readings on your answer sheet.
Your coach will also take the blood pressure of the three people you choose, to see how close you were. Be aware that a person's blood pressure can change from one person to another, but you should be in the "ball park."
These workshops were created for Unlimited Learning, Inc, and funded by the Colorado Dept. of Education, Adult Education and Family Literacy, 2016-17 ![]()